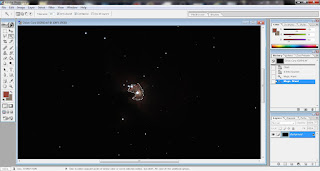
In my example I will use a small stack of 20 second, 120 second, and 420 second exposures all shot from my Celestron C8 SCT with a Hyperstar, operating at F/2.0 with a QHY-8 OSC camera. How many layers you use can vary from two exposures, to several. It depends on just how long your exposures are and how far you intend to stretch the data. For this exercise I will stretch the data to what I would consider a moderate degree, so only three layers will be used.
1. Open your stacks in Photoshop. We will work with the shortest exposure stack (20 second) first.
As you can see, this is such a short exposure that the only thing showing up is the Trapezium core. However, if you start to stretch the data too much by applying curves or levels, you end up showing more faint detail, at the cost of a blown out core as shown in the next screenshot.3. Press CTRL+C, then CTRL+V to copy the selected area and paste it as a new layer. This will be indicated in your "Layers" pane (Bottom Right in the screenshot below)
4. Select the bottom layer which would be labled "Background" in this instance. Now stretch the data using Curves (CTRL+M). I recommend a Curve map similar to what I've plotted in the screenshot.
This should draw out more of the nebulosity around the Trapezium core, yet, the core is protected as a seperate layer.
5. Flatten the seperate layer into the bottom layer (CTRL+E) or go through the Layer menu and select "Merge Layers".
7. Feather your selection, again 30 to 50 should do it.
8. Copy your selection (CTRL+C). But this time, you're going to bring up your next image stack, in this case my 120 second exposure stack. Paste the selected layer into the new image.
9. Apply Curves again, using a plot just like before.
10. Flatten the layers again. As you can see, the bigger picture is beginning to emerge, pulling out the faint detail while the brighter core areas are still under control.
11. This time we're going to repeat the process on the same layer as this one has much more exposure time and more data to be extracted. Select most of the bright nebulous area using Lasso or Magic Wand again. Feather the selection.
12. Paste on top of the existing image as a new layer.
13. Select the bottom layer again. Apply curves once more. There will probably be some variance between the layers. This will be compensated for in the next step.
Now if you put the stack you're working on beside the third and final layer (420 second in this instance) you can see where we're going by this point.
15. Flatten the two layers (CTRL+E) Select the brighter nebulosity again, and feather.
16. Pull up the third image stack, in this case the 420 second exposure stack, and paste the copied data into the image.
17. Apply Curves again, and then adjust the black point in Levels as before.
18. Flatten the layers again.
You should now have a fully stretched Orion Complex. This process can be expanded to include additional layers with longer and longer exposures. Below is what I was able to ultimately obtain using larger stacks of the exact same exposure lengths and combining them as above, and finishing up with other post processing techniques:
Hopefully this was of some help. Just remember, not everyone's data is the same, and your conditions may require a little tweaking on how you select and feather layers, and how aggressive you can apply curves.
Here is a link to the raw stacks, calibrated but unprocessed. Feel free to download and work with the data and see what you can come up with or if you can replicate the process I've described above.
Q: "How do I know when to stop layering and stretching with one exposure file and move up to the next?"
A: This one is relatively straight forward. Your short exposures (i.e. my 20 second core shot) will only stretch so far before the background areas and even some of the extended object become noise riddled and look terrible. I look at it as if I were stretching that layer like it was the only image I intended to post. So I stretch it until the presentation is optimal in my eyes, and then that's the data I use to copy into the next longer exposure and begin again with that image. If you carry over overstretched and overprocessed data, it will not do your end product any justice.
Q: "How do I know how much area to select for layering?"
A: This is where experimentation is advised as there's no magic answer. However, there is a really good way to get a feel for how much you should select and feather. Put two of the exposures side by side - i.e. the 20 second core shot, and the 120 second shot. Notice how much area is blown out in the longer shot. You need to select that much out of the shorter exposure and then some. When you feather you have to remember that it's a tapered effect on the edge of your selected data and that it will fade out gradually over the number of pixels you've selected. So if your selection is too small, and you feather, then move over to paste in as a new layer you may actually see the overexposed area bleeding through your new top layer causing discoloration, or a "ring" of sorts around your layer, making it very obvious what you did. You should aim to get not just the overexposed area selected in your short exposure layer, but you should try to expand that out an extra 10% or more to make sure you've got it covered. Feathering will take care of the blending for you.
Hope this helps.


No comments:
Post a Comment