Wednesday, August 24, 2011

Sadr Region - Captured by Robert (zerro1)

Robert was gracious enough to send me some raw data to process.  He shot the Sadr Region.  Here's the details on the data:

10 X 15 minutes lights
40 bias
20 darks
15 flats
Stacked/calibrated Images Plus 3.82
camera : QHY9
Scope : AT65EDQ
Mount :Atlas EQ-G
 
I did the post processing in Photoshop 7. 
 
I've never shot this area myself so it was fun to actually have some raw data to crunch.  Click to maximize the image.


Friday, July 29, 2011

Cocoon Data from Hyperstar

Last year Sal and I worked on Cocoon data from my Hyperstar rig.  I found some other subs I took and stacked them in as well, and reprocessed the old data to try and bring out more of the dust and increase contrast.  Whether it's better or not I suppose is subject to opinion.

Cocoon - Astrophotogallery.org

30x300sec, no darks
QHY-8 OSC Hyperstar III
Nexstar 8 GPS

Click a second time to maximize to full scale.

Saturday, July 2, 2011

The fires at night

Just finished capturing the fire in the dark from the same vantage point I used earlier.  It's growing, fast.  Here's a few shots.  You can see an observation aircraft trailing in one of the shots.  I animated the three images - taken about a minute apart from one another.  Observe how fast the fire is moving.


Friday, July 1, 2011

Los Alamos Fire from behind my home

The Los Alamos fire is raging out of control still.  We woke up this morning to the familiar smell of smoke and a clouded sky full of smoke and ash.  On my way home I noticed something on the ridge just North of me about 15 miles out.  Seems it's not as far away as originally thought...  After a month of choking on ash and smoke from the Wallow fire in AZ, we had hoped for a break.  The fires in NM are spreading rapidly and I fear for us all this weekend when the fireworks start going off.  No appreciable precipitation since October last year.  Looks like there won't be much AP going on this New Moon cycle either, just like the last one...


In any case, for those of you who wonder what it looks like where I do my AP from, here it is, minus the smoke and clouds usually.  Completely remote and void of light.  Nothing but open country.

Thursday, June 23, 2011

Lagoon and Trifid - Modified T1i

My 2nd attempt at prime imaging with my newly acquired Canon T1i. 

16 x 120 sec, no darks, no flats, no bias
Canon T1i @ ISO 200
W.O. 0.8x Focal Reducer/Flattener
Vixen ED80SF APO
CGEM stock mount
QHY-5 + 50mm Autoguider

Captured in average seeing conditions, and 70 degree temps.  I walked away not realizing I had a slight cable snag creating drag on the mount.  Stars are slightly out of shape as a result..  Bummer..

This camera is exceeding my expectations as I was bracing myself for dealing with high levels of noise with an uncooled camera in warm temps.  It's actually quite mild and can easily be processed out in stacking, evident in the fact I used no darks, and a very small stack of lights.  It's more sensitive than anticipated since I pulled a fair amount of detail with such short exposures.  Not my best Lagoon, but now that I'm a bit more familiar with the nuances of this camera, I will be making a more agressive pass on a target tomorrow night and through the weekend.

Here's a link to the image in my ASTROPHOTOGALLERY

Tuesday, June 21, 2011

Finally a break in the fire conditions - Sagittarius cloud quick pass

I haven't been outside in about 2 months due to regional fires, business travel, etc.  Last night was the first time in a long time that most of the sky was visible through the blanket of smoke and ash that has kept us under siege for weeks from the AZ Wallow fire.  Despite the sky still being degraded, and the Moon blazing away, I decided I needed to shoot something.  So I made a quick pass at Sag and surrounding areas with my newly acquired DSLR - this is only my second attempt using it for AP.

240 sec x 12, no darks, no flats, no bias
Canon T1i modified - Unguided on stock CGEM mount
Canon 18-55mm "nifty-fifty" lense @ F/4.0 ISO 200
Captured in 70 degree temps, and poor seeing
Acquisition - Backyard EOS
Stacking and balance - Nebulosity 2
Post processing in Photoshop 7

Couldn't push any further with the conditions, so I'll make another pass at this with more intensity pretty soon.

Click a second time after loading to maximize the image.


Picasa really compresses these shots something terrible.  Another copy of it is on ASTROPHOTOGALLERY.

I'll write up my own assessment of Backyard EOS shortly as this was my first time using it.  Absolutely wonderful software for this purpose and a little more friendly with DSLRs than Nebulosity as far as connectivity and settings.  A screenshot below.

Tuesday, June 7, 2011

Another Firey Sunset

The AZ fire continues, unchecked, and now burning over 350 square miles of land.  It's now posing a threat to towns in NM.  I tried again to get my dob up before sunset.  I had it up, went to put in an EP and focus.  Saw a sunspot perfectly.  Went to grab a camera and attach it, and the sun moved below my fence line.  Tomorrow I'm going to get this shot I want - an unfiltered shot of sun activity through a telescope, even if I have to drive to a field behind my house to do it.

Monday, June 6, 2011

Arizona Fires

Today is day 5 that New Mexico has been under siege from the Arizona Wildfire.  I just returned home from a day trip to San Diego and found it worse than ever.  It was raining ash the size of giant snow flakes.  Visibility on the west side of Albuquerque is down to maybe 800-1000 ft.  Normally I can view 11,000+ ft Mt. Taylor about 60 miles away with little problem.  I got to my house about 55 miles from the airport and the sun was barely visible as a red glowing orb.  It was perfect density to look at surface features naked eye.  By the time I got in my house and rushed to get the dob out to take high res pics unfiltered, the smoke had thickened too much.  I did snap a few fast ones with the digicam just to give you some perspective of how bad it really is.  I'll note that on my flight in, once we crossed the boarder into NM, the sky was fire orange/red the whole way in to the airport.

Saturday, June 4, 2011

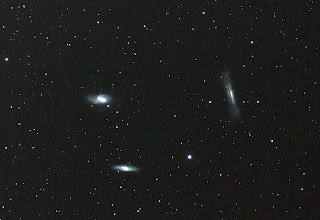
Leo Trio

16x90sec, no darks, no flats, no bias.  Canon T1i modified, Vixen ED80SF, WO .8x FF/FR.

Thursday, May 26, 2011

Cone, Fox Fur, Christmas Tree, etc

Robert loaned me some more data to mess with. I had a lot of fun with this one since I've never had the chance to seriously try to image it myself. It will have to wait until end of this year I suppose. Color balanced in Nebulosity. Post processed in Photoshop.

From this:


To this:

Wednesday, May 25, 2011

IC405 - Flaming Star Nebula

Robert (zerro1) was gracious enough to let me take a crack at some of his raw data stacks from his 1000D DSLR.  Here's what I came up with.

Update on the QHY-9

Been a while since I've updated the blog so I thought I'd post an update on the QHY-9.  After getting some input, and doing a more thorough examination the sensor itself is in tip top shape.  Seems the inner glass fogged and left a condensation stain on the bottom edge of the glass.  It just needs cleaned.  To do that, the chamber will have to be purged and the dessicant changed out to prevent future issues. 

As I posted before, it does indeed look like proper calibration frames subtract the artifact right out of the image.  I guess technically nothing has to be done about the glass stain.  Cleaning it off is probably a good idea though.

With all of my work travel lately and other household obligations, I have been giving up night after night of clear skies for sleep.  It's a sign that maybe now is a good time to switch gears.  I had what I feel was a really good DSO imaging run over the last year.  I cannot sustain those late nights at the moment to properly image DSOs any more.  Not after I got a taste of what putting several nights of camera time into a single image can actually do.  So, I'm putting the camera up for sale.  I'm also going to sell the Vixen OTA and accessories.  I bought it purely for imaging, and specifically to match up to the QHY-9. 

I haven't fully boiled down what I want to do next but I have a really good idea.  There are lots of AP imaging specialties that don't require sleepless nights.  Planetary, Solar, Widefield, etc etc...  None of these require heavy rigs, nor intense setup time, and in many cases, the gear is small enough to throw on an airplane with me.    More to come on this one.

Sunday, May 15, 2011

QHY-9 is damaged

Before I could even get this camera dialed in appropriate and take some serious shots, it would seem it's now damaged.  I noticed something odd in the last few calibration attempts I made, which became even more apparent in the flats.  Look at the artifact bottom center of this test flat frame:

If you fully expand the image you can see it much better.  There's another, more faint artifact next to it.  So I thought this was a hair, or something else that managed to find its way onto the IR window.  Curious since I use my Vixen ED80SF for nothing else but imaging and the QHY-9 is almost constantly attached.  It was showing up in my Light frames and Flats.  So I took the camera off and inspected it closely, expecting to have to clean the glass.  It wasn't on the IR glass, it appeared to be under it.  So I removed the IR window to look closer and found it to be actually on the sensor itself, inside of the CCD chamber.  What it looks like to me is some sort of epoxy or sealant boiled onto the sensor and hardended.  It has the appearance of dried, clear glue.  Getting a picture of this was difficult and it barely shows up with my digicam.  I can see it plain as day though.  Here's a couple attempted images of it.  I outlined the area on the second shot. 


I can't think of any way to remove this without destroying the sensor, not to mention that I'll have to get the chamber purged again if I open the chamber itself.  This camera hasn't been exposed to anything abnormal.  It's stored with my scope in my living room in controlled climate.  It's operated on clean, regulated power at night.  I thought possibly running the CCD for a little bit without the TEC on might generate enough warmth to allow whatever it is to run back off of the sensor.  The attempt was unsuccessful.  Unfortunately, I am the second owner so I don't believe any warranty is implied here.  I'm thinking the chip would have to be extracted and replaced - assuming it's possible on this camera. 


So, for now, I can crop about 10-15% of each frame out and continue to use it as is, or, I need a new camera.  This stinks since I was just ramping up for some Rho Ophiuchi imaging, and as any astrophotographer with experience knows, this area is huge.  It was already going to take me building a 4 panel mosaic to get it all in there with the QHY-9 and Vixen @480mm.  By losing the lower end of my frames, the mosaic tolerances just became more stringent.  I've made a number of imaging attempts since discovering the "smudge" on the chip.  It doesn't seem to be progressing or moving at all, so I suppose I can continue to operate this camera in a stable fashion, it just stinks to buy a big chip CCD like this for the purpose of having that big of a chip, and having to lose more than 10-15% of it.

Saturday, May 14, 2011

Lunar Images with the QHY-5 May 12, 2011

Shot May 12, 2011 about an hour after sunset in 40mph winds using my QHY-5 through the Vixen ED80SF @ F/7.5.  Camera set to a gain of 0% set at 5ms, 1000 frames per panel, best 150 stacked in AVIStack2.  Levels and mild deconvolution in Photoshop.  The first one was shot at 1280x1024, the second one was shot at 640x480 in 4 tiles and mosaic stitched manually in PS.  I wanted to see what sort of difference there would be.  The last one is a single 640x480 panel.  Personally, I don't usually like shooting during gibbous or full phases due to low contrast.  I yield better results during crescent phase.


Mothers day trip to Valley of Fire and Ice

Mother's Day we took the family to the Valley of Fire and Ice near the badlands in western NM.  It's a lava field filled with cinder cones, calderas, full volcanoes, lava tubes, etc.  I'm working on an insanely huge 24,000 pixel wide mosaic of inside of one of the volcanoes that we climbed into.  I took a quick snapshot of what it will look like (it's not processed yet, and this is a very small version so ignore the mismatched panels - below).  In one of the lava tubes is an Ice Cave - and the ice starts only 20 ft away from direct sunlight.  It's been there tens of thousands of years and is naturally cooled.  The ice inside the lava tube is somewhere around 30 ft thick and growing.  Literally, you can be in 100 degree temps and walk 20 ft and be in 30 degree temps.  Pretty neat anomaly if you ask me.  I also caught a shot of the Moon rising over one of the pine trees out in the lava field from inside of one of the lava tubes - image below as well.  And last but not least, I found a tree on one of the trails that had been nailed by lightning and burnt to a crisp.  The top was jagged and charred.  The Sun was quite high so I took advantage of my point of view and aligned the Sun with the top of the tree and came out with a pretty crazy effect.  The tree looks like a torch!  Be sure to blow this one up to maximum size to see the full effect.  Oh and, there wasn't a cloud in the sky when I shot this one which makes the shot all the more crazy.


Friday, May 13, 2011

Sagittarius and Polar Rotation videos

I tried posting these up through various online solutions like Flickr, Facebook, etc, and the compression is killing them.  So I had to resort to Mediafire.  Here's the link:

Sagittarius and Polar Rotation video clips

Here are a few of the single 60 second subs showing a few of the aircraft that made it through my FOV that night..  I think I counted over 50 when I screened the subs.  The uploader compressed these quite a bit, I can see the jpg artifacts showing up so ignore the crunchy, haloed stars...


Tuesday, May 10, 2011

Ophiuchus&Scorpius

Ophiuchus&Scorpius by DaemonGPF
Ophiuchus&Scorpius, a photo by DaemonGPF on Flickr.

Via Flickr:
Another segment of a Milky Way Mosaic I'm working on. It extends from Sagittarius, through Ophiuchus, Serpens, and part Scorpius.

Two Panels, shot two seperate nights. 75 x 120 sec
Canon T1i ISO 800, 18-55 @ F/4.5
CGEM Mount / QHY-5 autoguider
Stacked in Nebulosity
Post processing by Sal Grasso, who's working to help me resolve a color cast issue between other panels to finish the mosaic.

Sunday, May 8, 2011

Found a solution to the flats issue on the QHY-9

Referring earlier on in my blog history regarding problems with flats on my new QHY-9 OSC CCD camera - I believe I have found a viable solution. 

Reference to what I'm about to discuss can be found in these links:

Flats discussion 1

Flats discussion 2

Why this works, I don't quite understand fully yet, but here it goes.  I put a grey t-shirt over the objective.  Check out the results in this sample flat, and a quick image that I tested the flats against:


This is a stack of 5 second flats, just like before.  If you notice, the colors are not seperated by huge gaps and spread across the whole dynamic range like before with twilight or the white tshirt method.  Strange.
Here's the one image I calibrated with these flats:


I don't know why it worked, but it did.  More to follow after additional testing.

Friday, May 6, 2011

Sagittarius Cloud

This was only my second light with a DSLR and decided to try piggybacking.

Sagittarius Cloud by DaemonGPF
Sagittarius Cloud, a photo by DaemonGPF on Flickr.
Via Flickr:
Milky Way - Sagittarius region
120 sec x 20, no darks, no flats, no bias
Canon T1i + 50mm lense @ F/4.5
Piggybacked on my Vixen/CGEM rig and taken simultaneously with my QHY-9 image of M8 and M20.

Here's an annotated version:


Took this shot of M8 and M20 simultaneously with my QHY-9 through the Vixen ED80SF.
300sec x 14, darks, flats, bias applied

Wednesday, May 4, 2011

DSLR First Light Results

Leo Trio

M101

No darks, no flats, no bias used.  Thought it came out pretty good considering I had no prior experience with a DSLR.  No award winning shots here, but for a non-serious attempt I think it looks promising.  Hopefully 2nd attempt will be better.

Tuesday, May 3, 2011

1st light with DSLR, odd issue

A fellow CN'er was gracious enough to loan me a Canon T1i DSLR to try out for AP.  Not being all that dissimilar from a CCD - hooking it up, figuring out how to work the camera, focusing, drivers, etc were very straight forward.  I used the T-ring and T-thread adapter to attach it to my Vixen ED80SF and W.O. 0.8x FF/FR threads.  I was up and running within about 10 minutes.  I used Nebulosity 2 for capture.  Set the camera to manual, left it on the default ISO 1600, and tested some exposures to work out appropriate exposure time.  Around 90 seconds was optimal without over saturating.  The amount of detail showing up was superb at first glance.  I let it run on Leo Trio for 64 subs.  I took matching darks amidst the lights.  I captured bias and flats first thing in the morning 30 minutes prior to sunrise and kept them at 25,000 ADU.  I also shot 175 subs of M101.  Everything looked ok up to this point.  This morning I went to run my pre-processing routines - calibrating, stacking, etc.

After the stacking, I ran my usual initial data stretch and while the extended object detail was great, the background is a complete mess.  Looks like a 4 yr old took a red, green, and blue crayon and layed them on their sides and filled in the background with it in swiping motions.  I've never seen this issue in my OSC or Mono CCD astrocams.  For grins, I also tried repeating the pre-processing using Deep Sky Stacker.  EXACT same output.  To diagnose a bit further, I repeated the process in DSS and Nebulosity but subtracting each of the calibration file types one by one.  The problem doesn't seem to exist in the Darks, Flats, Bias.  It's in the light frames.  There is color noise/gradient apparent per each unstacked Light frame, but not consistent with the pattern apparent in the stacked exposures.  None of the calibration files even reduce the effect in any way, shape, or form.  The individual subs are increadibly noisey, as I had anticipated with an uncooled DSLR.  But I had also assumed proper calibration and a large stack of quality light frames would have taken care of the problem.  The extended objects and stars seem very smooth, but the background is horrific.  I'm attaching a crop of the stacked result with a data stretch to help emphasize the effect I'm seeing.  (When you expand the image, there are a few dark streaks, and I am aware that this is oversubtraction from darks not being perfectly matched.  That part I know how to fix.  The rest of the background effect is with no other post processing except a stretch to show it more predominantly.)


Following up on this issue, here's a crop of the stacked results from using only the latter half of the darks, flats, bias, lights, and a stretch only.

Here's a shot of just the latter half of the light frames stacked with no other calibration files added.  Interestingly enough, the background issue is gone.  Back to analysis on the calibration files I suppose.  Must have been way off on the temp matching.  More to follow.


Friday, April 22, 2011

Lunar Images Video Clip 04/22/11

Just a test vid I made with a sampling of lunar images. I'm working on a more inclusive one but wanted to see how this turned out first. Had to compress it to half resolution to upload it. Looking for a location to place a higher resolution version.

Some high res pics to go with it:

Lunar Images

Sunday, April 17, 2011

Old data!

Since the Moon is full, I've been taking the time to work out kinks in my new imaging rig, and clean up my image archives.  I stumbled upon a few in my files that I apparently stacked but never processed for whatever reason.  Here's M13 - 20x30sec with my old Hyperstar setup, and M81/M82 - 20x30sec.  No darks, no flats.  These had to have been some of my original test shots with the Hyperstar prior to adding a wedge and autoguiding.  There's no other reason I would have shot for that short of an exposure time.  None of these are top notch obviously, but it was fun to see how much I could pull out of these early shots.  I also have M17, but can't seem to get it uploaded without serious degradation.  Still working on it.

Click the images to maximize - lots of jpg compression artifacts in the small-scale versions that go away in full scale...


Friday, April 15, 2011

Fighting with Flats on the QHY-9

I've yet to figure out the issue with my Flats.  I take them with the same methodology as I did with my QHY-8 OSC in which, I had no issues.  I use either the "white tshirt" method, or the "dusk/dawn sky" method.  My color channels are not aligned at all regardless of what I do.  I can crank the gain to 100, 50, 0, no change.  Amp on, Amp off, no change.  Offset adjustments don't affect the seperation.  Exposure time changes nothing but where the three peaks show up in the histogram but they are always seperated.  I'll add that the optimal exposure times to land around 25K ADU/Max readout is at least several seconds in dim or strong light so the time is high enough that I'm thinking the shutter is not a factor here, I think?  I've checked for light leaks in the imaging train, and just to be sure I've wrapped everything up, except the fan on the camera of course.  I've had TEC on and off, no difference there.  I can't think of what the issue is.  However, I've yet to apply Flats with this camera that didn't worsen my light frames significantly.  Usually creating a nasty color gradient across the image - an effect that isn't present without the Flats.  Unfortunately, vignetting and dust motes are left behind of course.  I just don't get the problem here.  The IR filter is perfectly clean.  It's not in an extreme hot or cold environment right now.  I don't know what to do here.  I've attached a screenshot of my bias frames and data around it, along with a sample Flat, and the same Flat debayered as well so that I can show the color value readout.  One thing I'll note - when I debayer, then auto color balance, the flat looks like a proper flat.  Ideas?  I'm out of them.


Thursday, April 14, 2011

A quick first light with the flattener / reducer issues worked out...

Finally have all of the right parts in place, added a 40mm spacer between the W.O. 0.8x FF/FR II and the QHY-9.  The field looks much sharper now.  Instead of 20-30% of the field showing visible curvature, I figure maybe 5-10% of the field has any worth note, and even that portion has improvement so it's not terrible.  We're really only talking the extreme corners at this point.  Plus with the FOV I get anyway, cropping it out isn't a terrible loss.  A compromise I'm willing to accept.

Unfortunately I only squeezed out 9 subs x 150sec before I had to end my session.  Note that the moon was blazing away in the sky so between not having many subs and having the glowing orb of death making an impact, there's a pretty bad gradient in the background so I didn't push this image too hard.  I also was dealing with rediculously strong winds again so there's a slight elongation on the stars, but again it's minimal and should be a testament to how rigid the new rig is to be able to stand up to 40mph gusts.  I still have some issue with my flats that I don't have fully sorted out and plan to spend the weekend working on.  More to come on that topic.

Monday, April 11, 2011

An Evening of Lunar Imaging and Observing

Just finished setting up for an evening of Lunar imaging and observing.  QHY-5 primed in the ED80SF APO, and the XT6i is cooling down.  I plan to attempt an LRGB composite of the moon tonight with my QHY-5 - something I've never done before with lunar shots.  I took a snap of the gear, poised and ready to go, and snapped a quick digicam shot of the moon by hand through the XT6i just at sunset, blue filter installed.